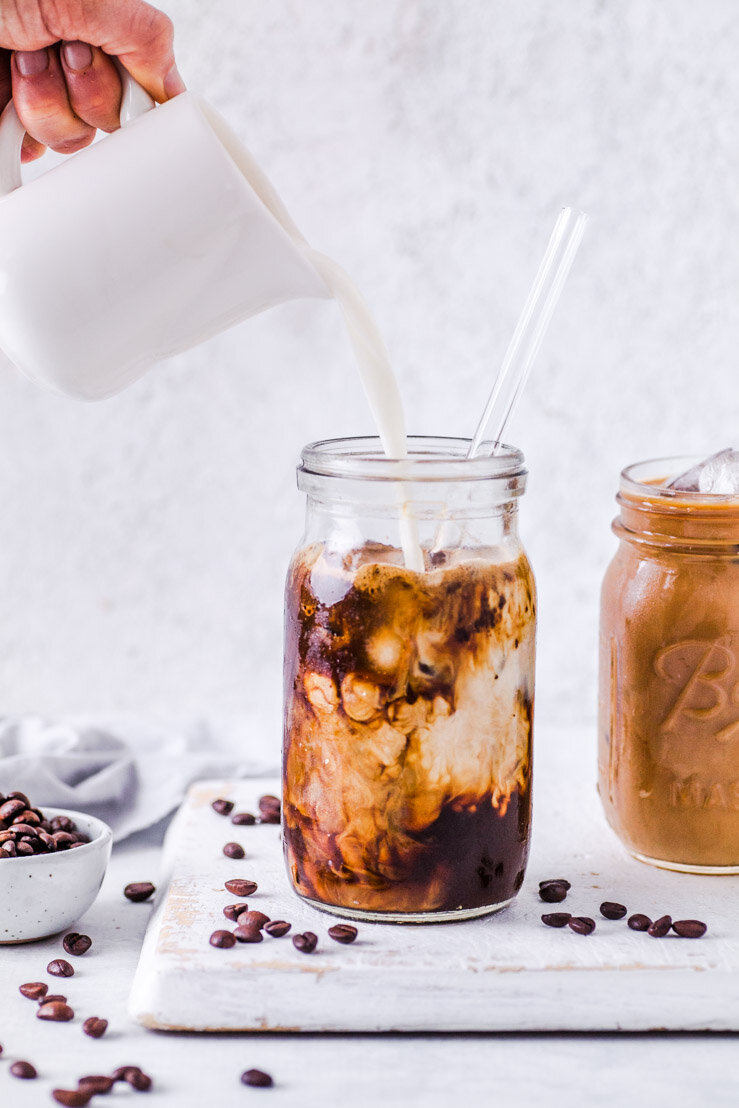
How To Style & Photograph A Swirled Iced Coffee Shot
When I first started out learning how to photograph and style food I would always wonder how people created certain shots. When Instagram took off there was always these amazing shots that people had created and I would look at them and wonder what exactly went into creating something like that. What camera setting did they use? Did they use certain little tricks to execute that type of shot? I am hoping to start sharing some tips and tricks here on this blog on how I go about creating certain shots giving you the full low down on everything I use and all camera settings etc so that you can learn how to create some of these shots yourself.
Today I am trying my hand and showing you in the process how I created the infamous swirled iced coffee shot that is taking Instagram & Pinterest by storm at the moment. It took me a couple of goes and a few variations to get the look that I was after. So let me tell you what I did to create the shots below.
The first step in creating the swirled Iced Coffee Shot is to set up the scene that you want to create this shot in. I used artificial light set up on the left hand side of the scene which was diffused with a white reflector on the right. I normally shoot with natural light but because I wanted to create a pour shot and needed there to be consistent light to shoot the pour. I opted to use my PixaPro LED S300D Studio Light at 100% with a 150cm Octagonal Umbrella Softbox on it. Once I got the lighting right I set the scene with the backgrounds & props that I wanted to use for the shot. I set these up how I wanted the shot to look and took a sample shot to make sure everything looked right.
I finished setting the scene with props and coffee beans in preparation for the pour shot I was going to create. I was shooting on my Canon 5D Mark II using my Tamron 90mm Macro Lens which was setup on my Manfrotto tripod. I used the burst shot setting on the camera so I was able to take multiple shots quickly using my canon remote. My camera settings for this setup was as follows: F/5.0 SS: 1/250 ISO/640. The next step was to fill the jar that I was going to use to photograph this pour shot with cold instant coffee. The key is to make sure the coffee is extremely strong so that you can see the contrast between the pour of the milk and the coffee. I wouldn’t recommend drinking this once finished. You probably will be jittery for days. I filled each jar with ice cubes and then poured the cold iced coffee mixture into the jars. In the shot below I filled it to the top but I probably would leave an inch or so from the top to make room for the milk to be poured in and create the swirl.
The series above is the first of my pour shots. I used pouring cream for this shot as I thought the thickness of the cream would swirl better in the coffee. As you can see it just kinda blobbed in one spot and didn’t swirl through all of the coffee. I ditched the cream idea and went straight to using milk. This first set of milk pour shots (see below) I didn’t leave enough room at the top of the jar for the amount of milk I needed to create the swirl. While it was good I knew I could do better. I also found out it was better to pour the milk towards the front of the jar so you could see the swirling action better.
So with the last series I left an inch or so from the top of the jar so that there would be enough room for milk to do it’s thing in the coffee. I also poured the milk closer to the front of the jar. When pouring the milk you want a steady even pour which is on the faster side to create the swirling effect with the coffee.
I would love to hear from you if you tried creating your very own Iced Coffee swirl shot. Tell me what you learnt in the process!


